Puppeteer is the most fantastic library developed by Google chrome and it became more popular day by day due to its versatile functionality.
With the help of Puppeteer, anyone automate his browser-specific task.
Think about if we can be able to do so then how much time we can be able to save and utilize that in doing some more important task.
We are not dealing basic concept of puppeteer here if you want to go through about basic concept of puppeteer then go for Introduction to Puppeteer from here you will get a basic idea about Puppeteer.
In the feature, we will be also discussing some new concept about some other concept of Puppeteer.
if you have no experience in software development then in that case also Puppeteer is not rocket science. It has been developed with the basic concept of javascript.
After learning Javascript you can be able to build your own application with Puppeteer and can be able to make your time-consuming task very easy with the help of it.
But In this post, we will discuss something more. In this post, we will build a script for posting a tweeter handler account using puppeteer without any user interaction.
We are creating this post just to show how puppeteer can be able to automate your daily activity with some work.
Now we came to the point and build our script. For implementing this script from our own way we have to consider these few points that we should have.
- Node.js should be installed on our system
- We should have a twitter account.
- Nothing more
Then now it’s time to write script
Step 1: Create a folder
Just create a folder of developing your script. Just like I have created
Step2: Execute npm init command
# Execute npm init

npm init
Step3: Install puppeteer using this command
# install puppeteer

npm install puppeteer --save
Step4: Create tweetTeeter.js file inside your folder
Step5: Create these separate function for your entire process like
# comment line
handleBrowser() : for opening and closing the browser.
loginTweeter(): for open twitter page and log in to twitter.
tweetTweeter(): for tweet on twitter.
tweetTwitterWithPuppeteer() : for calling all functions.
Now we have already completed the previous 4 steps now it’s time for implementing 5 steps
handleBrowser()
Note: Before running this code make sure that you have import puppeteer package inside your code.
# require puppeteer
const puppeteer=require("puppeteer");
Now go for handleBrowser() function
# comment line

async function handleBrowser() {

 /**
     * Open Browser
     */


    browser = await puppeteer.launch({
        headless: false,
    })
    //open new page
    page = await browser.newPage();
    //set screen
    await page.setViewport({ width: 1280, height: 800 })

}
After that, your browser will be opened.
loginTwitter() : handle login activity.
for implement loginTwitter() function add these few lines of code.
async function loginTweeter() {
    try {
        /** Define twitter fields */
        let twitterAccount = {
            userField: "input[name='session[username_or_email]']",
            passField: "input[name='session[password]']",
            loginSubmit: ".EdgeButton"
        };
        await page.goto('https://twitter.com');

        await page.waitFor(5000);
          /** Enter twitter id */
        await page.waitForSelector(twitterAccount.userField);
        await page.click(twitterAccount.userField);
        await page.keyboard.type('krdheeraj51');
          /** Enter twiiter password */
        await page.waitForSelector(twitterAccount.passField);
        await page.click(twitterAccount.passField);
        await page.keyboard.type('enter twitter password');
          /** Click Button  */
        await page.waitFor(2000);
        await page.waitForSelector(twitterAccount.loginSubmit);
        await page.click(twitterAccount.loginSubmit);
        await page.waitFor(3000);
    } catch (err) {
        console.log(err);
        return err;

    }
}
loginTwitter() : function at first open the login page then after entering your username and password.
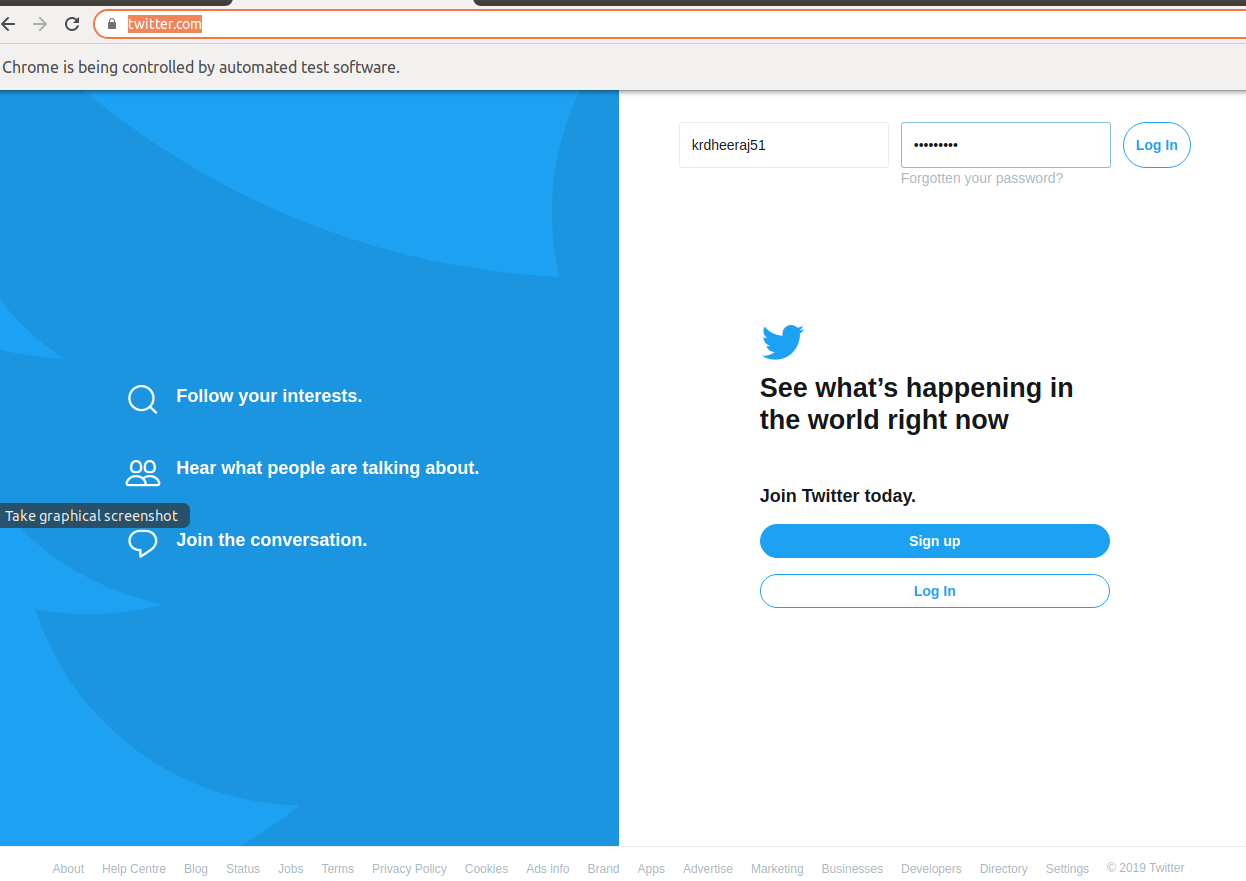
And then after click on submit button and you will redirect to twitter home page.
tweetTwitter() : function that writes tweet and post from your twitter account and for this purpose write these few lines of code.
async function tweetTweeter() {
try {
await page.goto('https://twitter.com/home');
/**
* tweet on twitter
*/
await page.waitForSelector('.DraftEditor-editorContainer');
await page.click('.DraftEditor-editorContainer');
/**
* write your twitter post
*/
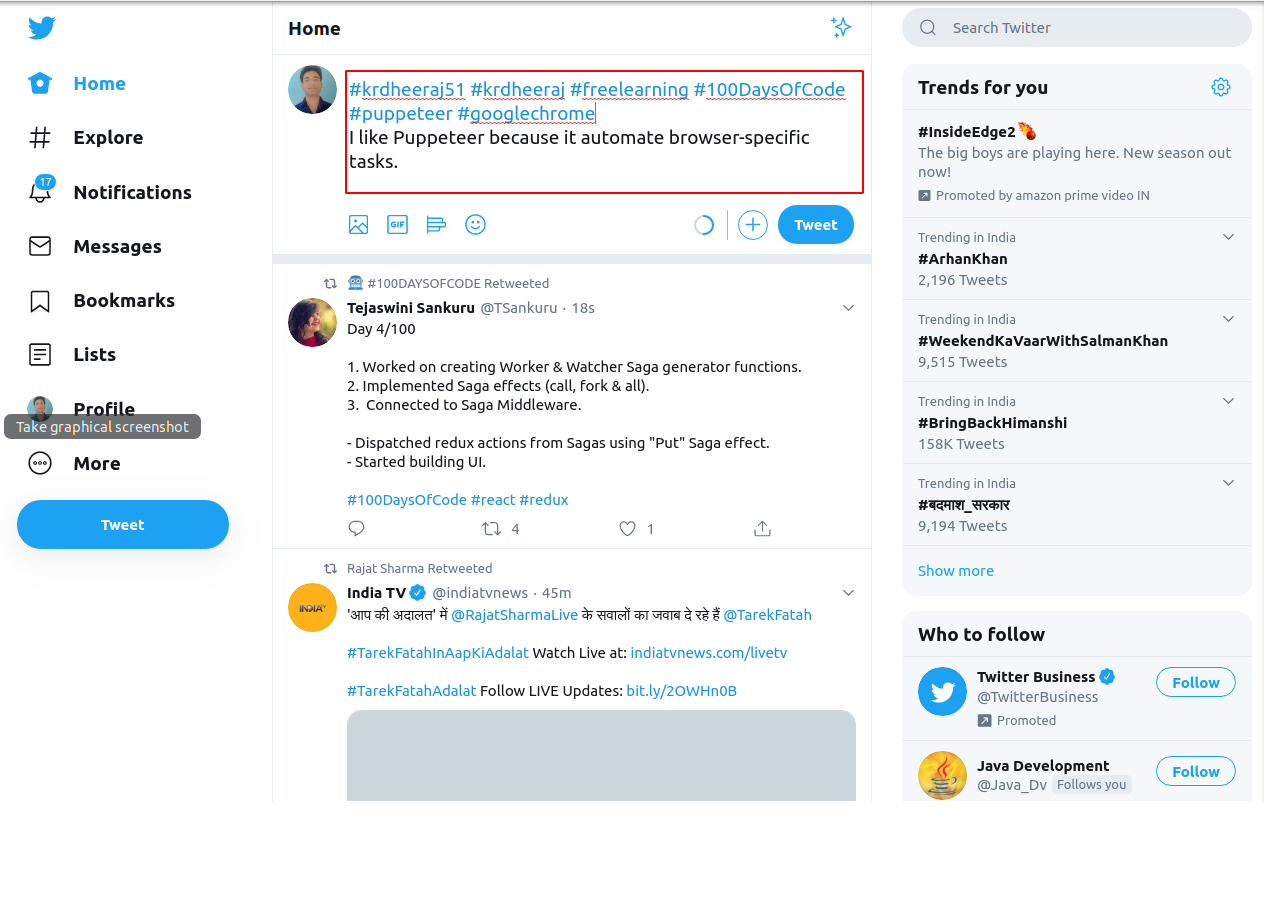
await page.keyboard.type("krdheeraj51 #krdheeraj #freelearning #100DaysOfCode #puppeteer #googlechrome I like Puppeteer because it automate browser-specific tasks.");
await page.waitFor(3000);
/**
* Click tweet button for submit post
*/
await page.waitForSelector('#react-root > div > div > div > main > div > div > div > div.css-1dbjc4n.r-14lw9ot.r-1tlfku8.r-1ljd8xs.r-13l2t4g.r-1phboty.r-1jgb5lz.r-11wrixw.r-61z16t.r-1ye8kvj.r-13qz1uu.r-184en5c > div > div.css-1dbjc4n.r-14lw9ot.r-184en5c > div.css-1dbjc4n.r-156q2ks > div:nth-child(1) > div > div > div.css-1dbjc4n.r-1iusvr4.r-16y2uox.r-15d164r.r-5f2r5o.r-1bylmt5.r-13tjlyg.r-7qyjyx.r-1ftll1t > div:nth-child(2) > div > div > div:nth-child(2) > div.css-18t94o4.css-1dbjc4n.r-urgr8i.r-42olwf.r-sdzlij.r-1phboty.r-rs99b7.r-1w2pmg.r-1n0xq6e.r-1vuscfd.r-1dhvaqw.r-1fneopy.r-o7ynqc.r-6416eg.r-lrvibr')[0];
await page.click('#react-root > div > div > div > main > div > div > div > div.css-1dbjc4n.r-14lw9ot.r-1tlfku8.r-1ljd8xs.r-13l2t4g.r-1phboty.r-1jgb5lz.r-11wrixw.r-61z16t.r-1ye8kvj.r-13qz1uu.r-184en5c > div > div.css-1dbjc4n.r-14lw9ot.r-184en5c > div.css-1dbjc4n.r-156q2ks > div:nth-child(1) > div > div > div.css-1dbjc4n.r-1iusvr4.r-16y2uox.r-15d164r.r-5f2r5o.r-1bylmt5.r-13tjlyg.r-7qyjyx.r-1ftll1t > div:nth-child(2) > div > div > div:nth-child(2) > div.css-18t94o4.css-1dbjc4n.r-urgr8i.r-42olwf.r-sdzlij.r-1phboty.r-rs99b7.r-1w2pmg.r-1n0xq6e.r-1vuscfd.r-1dhvaqw.r-1fneopy.r-o7ynqc.r-6416eg.r-lrvibr')[0];
await page.waitFor(5000);
console.log("Tweet has been posted successfully.");
/**Close browser */
browser.close();
} catch (err) {
console.log(err);
}
}
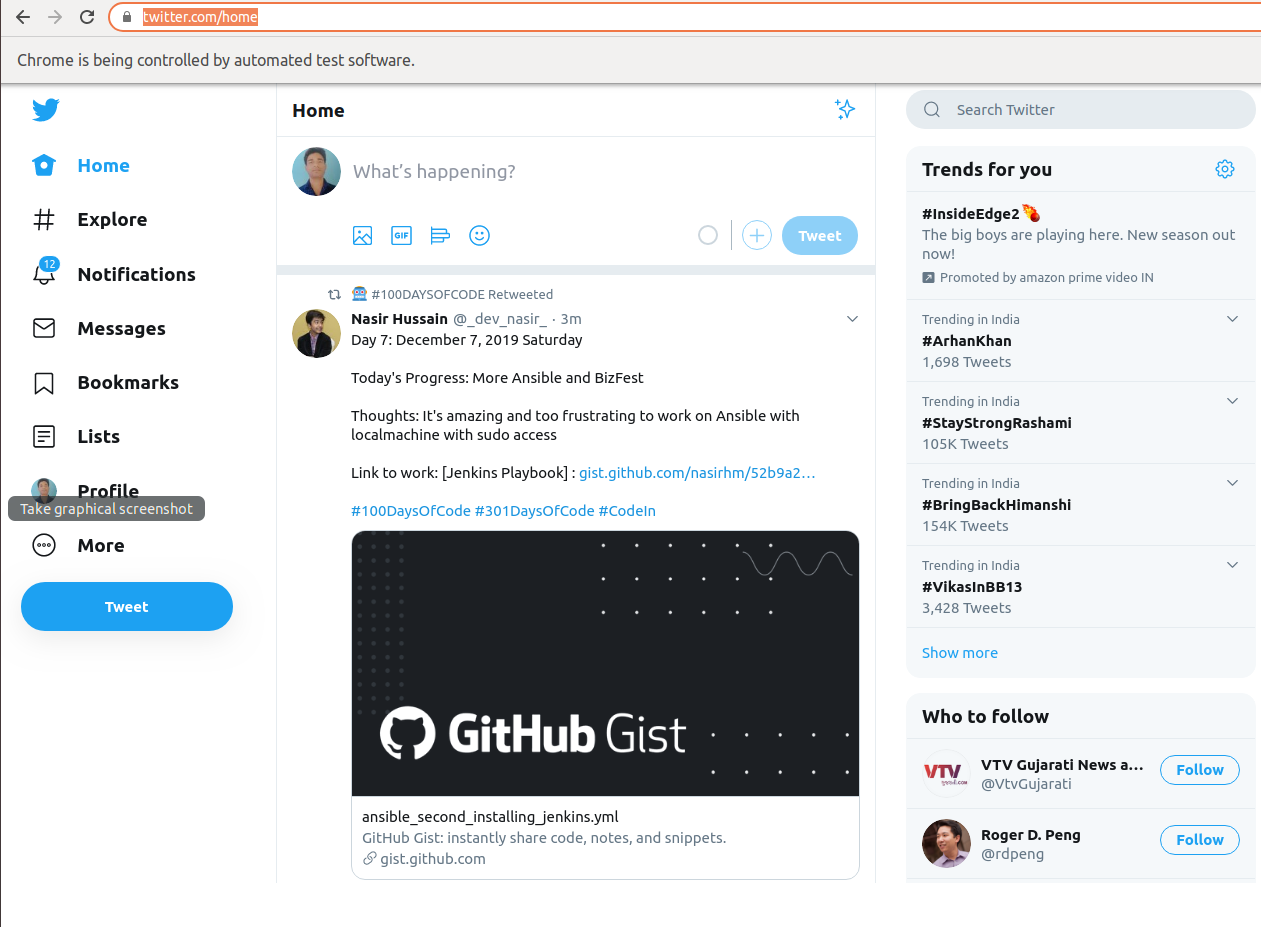
After executing this function your tweet added
Then after posted from your Twitter account.

tweetTwitterWithPuppeteer() : These all functions are handled in a single for performing these complete process in a complete chain which contains these few lines of code.
async function tweetTwitterWithPuppeteer() {
    try {
         /** handle browser activity */
        await handleBrowser();
         /** handle login Activity */
        await loginTweeter();
         /** handle tweet activity */
        await tweetTweeter();
    } catch (err) {
        console.log(err);
        return err;
    }
}
Now Your complete script will be look like
/**
 * require puppeteer library
 */
const puppeteer = require("puppeteer");

async function tweetTwitterWithPuppeteer() {
    try {

        /** handle browser activity */
        await handleBrowser();
         /** handle login Activity */
        await loginTweeter();
         /** handle tweet activity */
        await tweetTweeter();
    } catch (err) {
        console.log(err);
        return err;
    }
}

/**
 * call tweetTwitterWithPuppeteer() i.e is handling whole process
 */
tweetTwitterWithPuppeteer();

async function loginTweeter() {
    try {
         /** Define twitter fields */
        let twitterAccount = {
            userField: "input[name='session[username_or_email]']",
            passField: "input[name='session[password]']",
            loginSubmit: ".EdgeButton"
        };
        await page.goto('https://twitter.com');

        await page.waitFor(5000);
         /** Enter twitter id */
        await page.waitForSelector(twitterAccount.userField);
        await page.click(twitterAccount.userField);
        await page.keyboard.type('krdheeraj51');
         /** Enter twiiter password */
        await page.waitForSelector(twitterAccount.passField);
        await page.click(twitterAccount.passField);
        await page.keyboard.type('enter twitter password');
         /** Click Button  */
        await page.waitFor(2000);
        await page.waitForSelector(twitterAccount.loginSubmit);
        await page.click(twitterAccount.loginSubmit);
        await page.waitFor(3000);
    } catch (err) {
        console.log(err);
        return err;

    }
}

async function tweetTweeter() {
    try {
        await page.goto('https://twitter.com/home');
         /**
         * tweet on twitter
         */
        await page.waitForSelector('.DraftEditor-editorContainer');
        await page.click('.DraftEditor-editorContainer');
         /**
         * write your twitter post
         */
        await page.keyboard.type("krdheeraj51 #krdheeraj #freelearning #100DaysOfCode #puppeteer #googlechrome  I like Puppeteer because it automate browser-specific tasks.");
        await page.waitFor(3000);
         /**
         * Click tweet button for submit post
         */
        await page.waitForSelector('#react-root > div > div > div > main > div > div > div > div.css-1dbjc4n.r-14lw9ot.r-1tlfku8.r-1ljd8xs.r-13l2t4g.r-1phboty.r-1jgb5lz.r-11wrixw.r-61z16t.r-1ye8kvj.r-13qz1uu.r-184en5c > div > div.css-1dbjc4n.r-14lw9ot.r-184en5c > div.css-1dbjc4n.r-156q2ks > div:nth-child(1) > div > div > div.css-1dbjc4n.r-1iusvr4.r-16y2uox.r-15d164r.r-5f2r5o.r-1bylmt5.r-13tjlyg.r-7qyjyx.r-1ftll1t > div:nth-child(2) > div > div > div:nth-child(2) > div.css-18t94o4.css-1dbjc4n.r-urgr8i.r-42olwf.r-sdzlij.r-1phboty.r-rs99b7.r-1w2pmg.r-1n0xq6e.r-1vuscfd.r-1dhvaqw.r-1fneopy.r-o7ynqc.r-6416eg.r-lrvibr')[0];
        await page.click('#react-root > div > div > div > main > div > div > div > div.css-1dbjc4n.r-14lw9ot.r-1tlfku8.r-1ljd8xs.r-13l2t4g.r-1phboty.r-1jgb5lz.r-11wrixw.r-61z16t.r-1ye8kvj.r-13qz1uu.r-184en5c > div > div.css-1dbjc4n.r-14lw9ot.r-184en5c > div.css-1dbjc4n.r-156q2ks > div:nth-child(1) > div > div > div.css-1dbjc4n.r-1iusvr4.r-16y2uox.r-15d164r.r-5f2r5o.r-1bylmt5.r-13tjlyg.r-7qyjyx.r-1ftll1t > div:nth-child(2) > div > div > div:nth-child(2) > div.css-18t94o4.css-1dbjc4n.r-urgr8i.r-42olwf.r-sdzlij.r-1phboty.r-rs99b7.r-1w2pmg.r-1n0xq6e.r-1vuscfd.r-1dhvaqw.r-1fneopy.r-o7ynqc.r-6416eg.r-lrvibr')[0];
        await page.waitFor(5000);
        console.log("Tweet has been posted successfully.");
         /**Close browser */
        browser.close();

    } catch (err) {
        console.log(err);

    }
}
async function handleBrowser() {
     /**
     * Open Browser
     */
    browser = await puppeteer.launch({
        headless: false,
    })
     //open new page
    page = await browser.newPage();
     //set screen
    await page.setViewport({ width: 1280, height: 800 })

}
For executing this script use this command
node filename.js
/**
 * like here file name is tweetTwiteer.js
*/
You can also download a complete project from Github