Introduction to Puppeteer

Puppeteer is a Node.js library that allows you to control Chrome browser from JS code. Most things that you can do manually in the browser can be done using Puppeteer. Here are a few examples to get you started:

Most things that we do manually in the browser.Can be done using puppeteer easily.

What we can do?

  • Scrap web page
  • Automate process on the web
  • Take screenshot of web pages
  • Generate pdf from HTML

How to start with Puppeteer?

For starting with Puppeteer we have to follow these few steps

    1. Install Puppeteer
    2. Load Puppeteer module
    3. Launch Browser
    4. Headless mode
    5. Open tab inside Browser
    6. Open page inside Browser
    7. Close Browser

Install Puppeteer


Installing Puppeteer

Load Puppeteer package

In node.js we load the package using require like


const puppeteer = require('puppeteer');

Launch browser

To launch browser with puppeteer we have to use launch() method


(async () => {
 const browser = await puppeteer.launch();
})();

We can also write this


puppeteer.launch().then(async browser =>{
});

Headless mode

Puppeteer launches chromium in headless mode.

By default puppeteer launch in headless mode i.e


{headless:true}

This means when we will run the application our browser will not be opened.
But during the process, we can make our browser open and for this, we have to make

Open tab inside Browser

nextPage() method on browser object to get page Object.


const puppeteer = require('puppeteer');

(async () => {

const browser=await puppeteer.launch();
const page=await browser.newPage();
});

Open page inside Browser

page.goto() method used for open particular page inside opened browser


const puppeteer = require('puppeteer');

(async () => {

const browser=await puppeteer.launch();
const page=await browser.newPage();
await page.goto("https://google.com/");
});

Close Browser

Textbrowser.close() Used for close browser Once task has been completed.


await browser.close(); 

Example :

Here we are opening google.com using puppeteer


const puppeteer = require('puppeteer');

(async () => {
 const browser = await puppeteer.launch();
 const page = await browser.newPage();
 await page.goto('https://google.com/');
 await browser.close();
})();

For running application we use command
During the above process, the browser will be opened and closed and we can’t be able to track the process. Because in this case {headelss: true}

If we want to track process then, in that case, we have to take {headelss: false}. In this case, the browser will be visualized and we can be able to see steps and debug our code if required.


const puppeteer = require('puppeteer');

const puppeteer = require('puppeteer');

(async () => {
 const browser = await puppeteer.launch({headless:false});
 const page = await browser.newPage();
 await page.goto('https://google.com/');
 await browser.close();
})();

Here we are not dealing with all methods of puppeteer because it has been already done on its official site https://pptr.dev/.

What are we doing here?

Our main purpose is to take an idea of puppeteer and making projects so that we have a good hand on puppeteer.
For this purpose, we need to familiar with some important classes and modules of puppeteer and that we will cover here.

Classes of puppeteer module

These are some important classes of puppeteer module

page method

page class is a very important class in the puppeteer module. Without creating page Object we can’t be able to open a page on chrome browser.

Some methods of page() class

Method Way to write Description
$(selector) await page.$(‘.common’) querySelector on the page.
$$(selector) await page.$$(‘#intro’) querySelectorAll on the page.
goto(url) await page.goto(‘url’) a
Used for open a specified url.
content() await page.content() Get an HTML source of the page.
click(selector) await page.click(‘button#submit’) a
Mouse click event on the element pass as a parameter.
hover(selector) await page.hover(‘input[name=”user”]’) Hover particular elemet.
reload() await page.reload() a
Reload a page.
pdf() await page.pdf({path:’file.pdf’}) Generate pdf for open url page.
screenshot() await page.screenshot({path:file.png’}) Take screenshot of page and save as png format.

Web Scraping with R

Now a days to run a business we have need to understand business pattern, Client behavior, Culture, location, environment. In the absence of these, we can’t be able to run a business successfully.

With the help of these factors, the probability of growing our business will become high.

So, In simple terms to understand and run a business successfully, we have need Data from which we can be able to understand Client behavior, business pattern, culture, location, and environment.

Today one of the best sources for collecting data is web and to collect data from the web there are various methods.

One of them is Web Scraping in different languages we extract data from web from different ways.

Here we will discuss some of the methods for extracting data from the web using R Language.

There are various resources on the web and we have various techniques for extracting data from these different resources.

Some of these resources are :

    • Google sheets
    • Wikipedia
    • Extracting Data from web tables
    • Accessing Data from Web 

Read Data in html tables using R

Generally for storing large amounts of data on the web, we use tables and here we are discussing the way for extracting data from html tables. So, without further delay, we are following steps for extracting data from html tables.

During this session, we have design some steps  so that anyone can be able to access html tables following steps:

  1. Install library
  2. Load library
  3. Get Data from url
  4. Read HTML Table
  5. Print Result

Install library


# install library
install.packages('XML')
install.packages('RCurl')

During reading data from web generally, we used these library 


# load library 
library(XML)
library(RCurl)

Get Data from url

During this session, we will extract the list of Nobel laureates from Wikipedia page and for that at first copy url of table and here is url


https://en.wikipedia.org/wiki/List_of_Nobel_laureates#List_of_laureate

In R we write these lines of code for getting data from url.


# Get Data from url
url <- "https://en.wikipedia.org/wiki/List_of_Nobel_laureates#List_of_laureates"
url_data <- getURL(url)

Read HTML Table

Now it’s time to read table and extract information from the table and for that we will use readHTMLTable() function.


# Read HTML Table
data <- readHTMLTable(url_data,stringAsFactors=FALSE)

Print Result

Finally, our data has been stored in data variable and now we can print this


# print result
print(data) 

Here is complete code for reading HTML table from web using R


# install library
install.packages('XML')
install.packages('RCurl')
# load library 
library(XML)
library(RCurl)
# Get Data from url
url <- "https://en.wikipedia.org/wiki/List_of_Nobel_laureates#List_of_laureates"
url_data <- getURL(url)
# Read HTML Table
data <- readHTMLTable(url_data,stringAsFactors=FALSE)
# print result
print(data)

rvest package for Scraping

rvest is most important package for scraping webpages. It is designed to work with magrittr to make it easy to scrape information from the Web inspired by beautiful soup.

Why we need some other package when we already have packages like XML and RCurl package?

During Scraping through XML and RCurl package we need id, name, class attribute of that particular element.
If Our element doesn’t contain such type of attribute, then we can’t be able to Scrap information from the website.
Apart from that rvest package contains some essential functions that enhance its importance from other packages.
During this session also, we have to follow the same steps as we have designed for XML and RCurl package access HTML tables. We are repeating these steps :

    1. Install package
    2. Load package
    3. Get Data from url 
    4. Read HTML Table
    5. Print Result

we are repeating same example as we have discussed before but with rvest package.

Install package


# install package
install.packages('rvest')

Load package


#load package
library('rvest')

Get Data from url and Read HTML Table


url <- 'https://en.wikipedia.org/wiki/List_of_Nobel_laureates'
# Get Data from url and Read HTML Table 
prize_data <- url %>% read_html() %>% html_nodes(xpath = '//*[@id="mw-content-text"]/div/table[1]') %>%
  html_table(fill = TRUE)

Here we have combined two steps with a single step and i.e beauty of piping in R. Apart from that inside html_nodes() method we have used XPath.
Yeah with rvest package we have to use Xpath of element that we want to copy.
And steps for copy XPath as shown below inside image in which we are copying XPath of table

print Data


#print Data
print(prize_data)

Here is complete code for reading HTML table from web using rvest in R


# install package

install.packages('rvest')

#load package
library('rvest')
url <- 'https://en.wikipedia.org/wiki/List_of_Nobel_laureates'
# Get Data from url and Read HTML Table
prize_data <- url %>% read_html() %>% html_nodes(xpath = '//*[@id="mw-content-text"]/div/table[1]') %>%
  html_table(fill = TRUE)
# read prize data
print(prize_data)

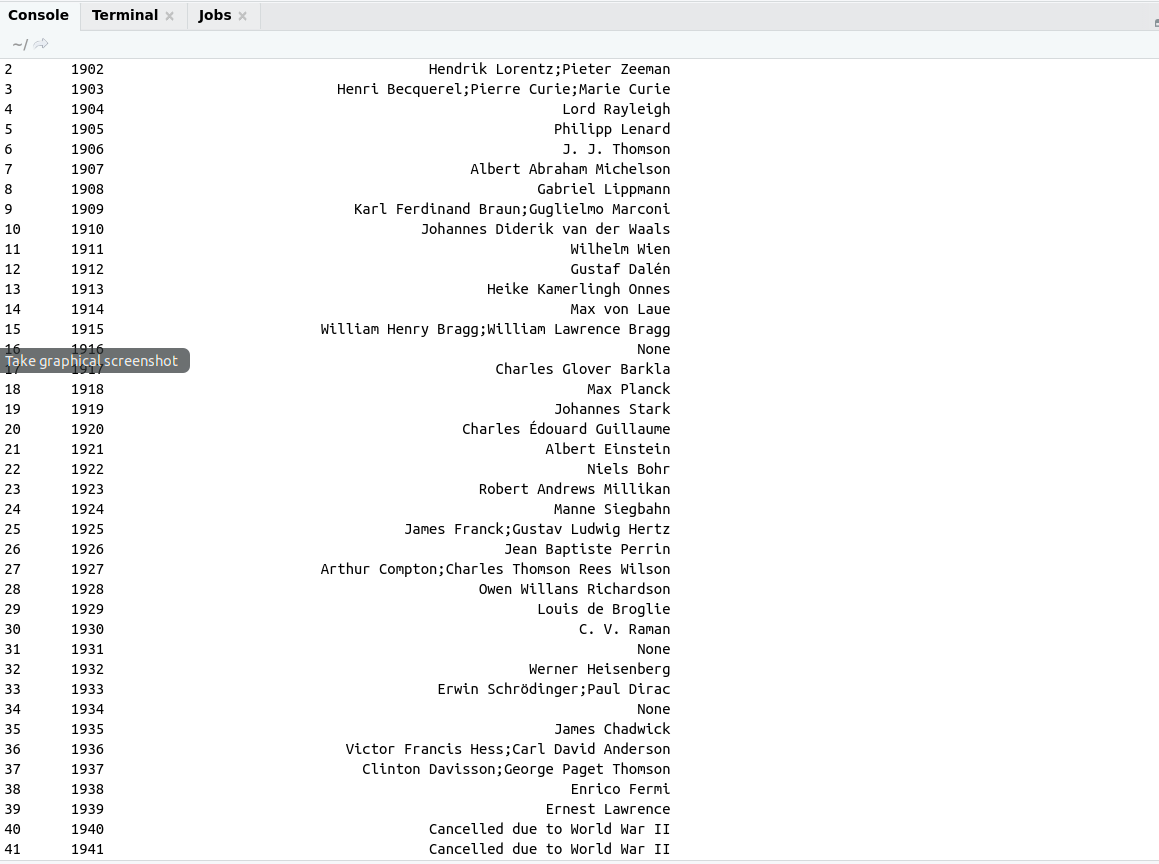
Both example i.e reading table with XML and RCurl package and reading the same table with rvest package that will be looked like 
Output:

web Scraping output in R
Note : we will go through more examples on rvest in the next post but before that we took a quick introduction of googlesheets package in R.

Extracting Data from Google sheets :

Google sheets became one of the most important tools for storing data on the web. It is also useful for Data Analysis on the web.

In R we have a separate package for  extracting Data from web i.e googlesheets

How to use Google Sheets with R?

In this section, we will explain how to use googlesheets package for extracting information from google sheets.

We have the process of extracting data from google sheets  in 5 steps

  1. Installing googlesheets 
  2. Loading googlesheets 
  3. Authenticate google account
  4. Show list of worksheets
  5. Read a spreadsheets
  6. Modify the sheet

Install googlesheets package


install.package("googlesheets")

Loading googlesheet


library("googlesheets")

Authenticate google account


gs_ls()

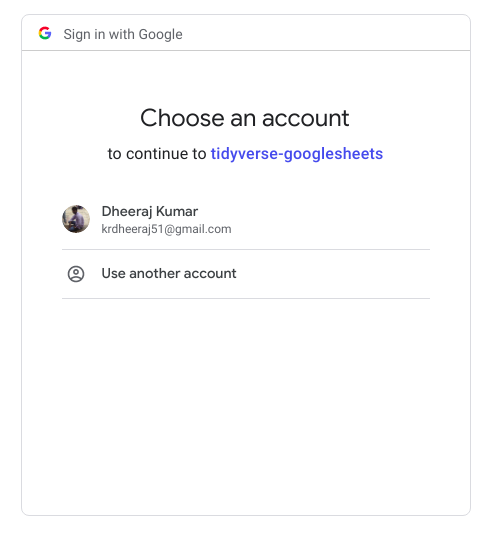
After that in the browser authentication page will be opened like shown below

Complete code


 # install packages 
 install.packages('googlesheets') 
 # load library
 library('googlesheets')
 # Authentication complete,Please close this page and return 
 gs_ls()
 # take worksheet with title
 take_tile <- gs_title("amazon cell phone items")
 #get list of worksheets
  gs_ws_ls(be)
    

More Tutorials on R

Introduction to Text mining in R

Introduction to Text mining in R Part 2

Create Word Cloud in R