Stylish JavaScript with es6

ECMAScript is the Standard version of Javascript with a goal of unifying language specifications and features. All significant Browsers and JavaScript compilers support ECMAScript.

In this post, we will cover some major key points of es6 

Variable with es6
Objects with es6
Function with es6

Variable with es6

Variable Declaration with es6

In JavaScript for declaring a variable var keyword is used.

Example :


# comment line 
var someVariable ="Some thing";
console.log(someVariable)

Output:

javascript variable Decleration

But in case of es6 we have three keywords for Declaring a variable these are let, var , const.

Then question arises

Why es6 contains three keywords for declaring a variable?

 Or

What is the problem with ‘var’ keyword so that ECMAScript was needed to introduce two more keywords?

The biggest problem with var keyword is that we can overwrite a variable declaration without any error.

Example :


/**
* Overwrite a Variable
*/

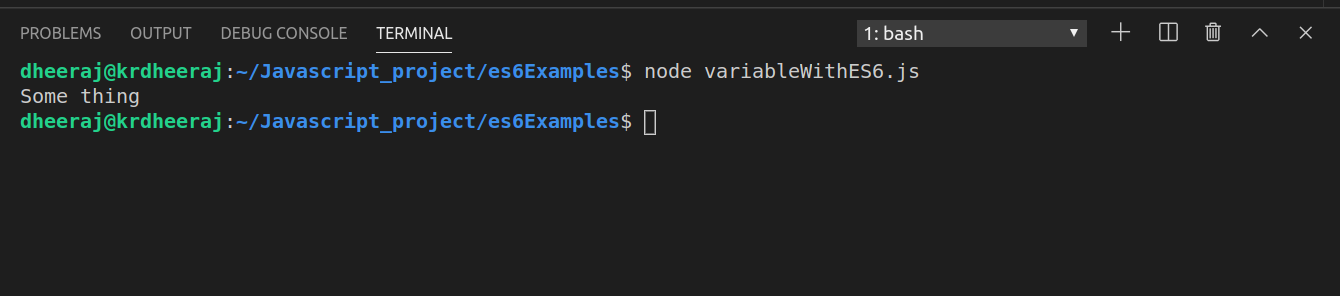
var someVariable="Something";
var someVariable="Nothing";
console.log(someVariable);

Output:

overwrite variable with Javascript

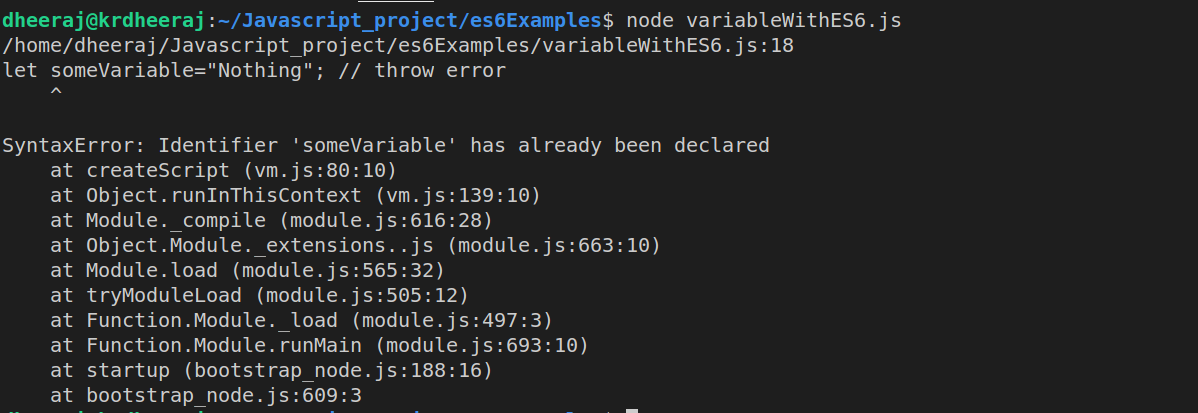
But in case of Declaration with let keyword, we can’t do so.

Example :


/**
* Overwrite a variable with let keyword
*/

let someVariable="Something";
let someVariable="Nothing"; // throw error
console.log(someVariable);

OutPut:

Similarly, const keyword is used for declaring a constant variable inside the complete script.
Example:


/**
* Calculate Area of Circle
*/
Types of Joins
Const PI =3.14
let radius=12m;
console.log("Area of Circle is :: ",(PI*(radius*radius)));

Objects with es6

Objects are similar to Arrays. But in Objects, we can access and modify data with the help of their properties.
But in the case of Arrays, we use indexes to access and modify data.

Objects are Userful for Storing data

Data in a structural way looks like real-world data.


/**
  * Declaring an Object
*/


var book={
  "name":"IKIGAI",
   "author":"Hector Garcia & Francesc Meralies" ,
   "publication":"Penguin"
}

In the above example, Book is an Object and name, author and publication are its properties.

How to access JavaScript Objects?

For accessing JavaScript Object (Same for es6) we can follow these approaches :

  • Accessing JavaScript Object Properties using DotNotation
  • Accessing JavaScript Properties with Bracket Notation
  • Accessing JavaScript Properties with Variables
Accessing JavaScript Object Properties using DotNotation


/**
  *Accessing Javascript Object using DotNotation 
*/

var book={
  "name":"IKIGAI",
   "author":"Hector Garcia & Francesc Meralies" ,
   "publication":"Penguin"
}
//accesing book name
console.log(book.name);
//accessing book author
console.log(book.author);
//accessing book publication
console.log(book.publication);

Output:

Accessing JavaScript Properties with Bracket Notation

We can access the above values also using Bracket Notation.


/**
  *Accessing Javascript Object using BracketNotation 
*/

var book={
  "name":"IKIGAI",
   "author":"Hector Garcia & Francesc Meralies" ,
   "publication":"Penguin"
}
//accesing book name
 console.log(book["name"]);
//accessing book author
console.log(book["author"]);
//accessing book publication
 console.log(book["publication"])

Output:

Accessing JavaScript Properties with Variables

We can also access JavaScript Objet with help of Variables as shown below example. Again in case of Accessing JavaScript Properties with Variables, we are going to use Bracket Notation.


/**
  *Accessing JavaScript Properties with Variables
*/

var favourite = {
      game: "Cricket",  food: "Litti",  movieSeries: "X-man"
  };
  var myFavourite = "food";  //Declaring a new variable
  var myFavouriteFood = favourite[myFavourite];
  console.log("My favourite Food ::",myFavouriteFood); 

OutPut:

In this example, Object favorite contains a set of key-value pairs i.e properties and we will access properties of favorite objects on the basis of a variable myFavorite.

Function with es6

For Declaring a function in Javascript there are several ways.
Simplest way
Simplest way for declaring a function in Javascript is
Syntax:


/**
  *function declaration
*/


function function_name(){

 //function body 
}

Example: Add Two Numbers in JavaScript


/**
  * funtion decalartion
  */
 
 function addNum(a,b){
 
   return console.log("Addition of Two Numbers :: ",a+b);
 
 }
//calling function
 
 addNum(5,6);

OutPut:

Anonymous Function

A function which doesn’t contain its name is known as Anonymous function.
We can perform the same operation using the Anonymous function.
Syntax :


function (){
    //function body 
}

Example:


/**
  * Anonymous function declaration
  */

 
 var addNum =function (a,b){
   
   return console.log("Addition of Two Numbers :: ",a+b);
 }
//calling function
 addNum(5,6);

OutPut:

Arrow function

es6 introduces a new way for function declaration known as Arrow function.
Syntax:


()=>{

  //function body

}

Example:


/**
  * arrow funtion decalartion
  */

 let  addNum = (a,b) =>{
   return console.log("Addition of Two Numbers :: ",a+b);
 }
//call function
addNum(5,6);

OutPut:

AWS Lambda deploy with Severless

AWS Function

If you are using AWS as a service provider then all function that you are using on AWS platform is known as AWS lambda function.

Serverless

Configuration

All of the lambda functions that we have created can be found in serverless.yml file under functions property.

How to generate serverless file for our Application?

Getting started with Serverless Framework and AWS

Open your Terminal and choose a specific folder

Execute the following command


# Install the serverless cli
npm install -g serverless

# Or, update the serverless cli from a previous version

npm update -g serverless

After that severless-cli has been successfully installed on your system.we can create our project using following command


# Create and deploy a new service/project

serverless

Note: Before going for serverless framework make sure your system should have Node 6 or higher on Your machine, if not then first do that.
After that during the process, it will ask a few questions just follow them

  1. It will ask you log in on serverless or if you no account then create account 
  2. Ask you to give permission for connecting with AWS
  3. Then after on AWS account, it will ask to your account user Iamrole assign it and then after it will generate Access key ID  and Secret access key 
  4. Your terminal will ask for that Access key ID  and Secret access key just enter this information and after that, your project has been successfully created.

After that our Serverless has been successfully created now we have to follow steps for creating our Lambda function and deploy on AWS using serverless framework.

Configuration


service: serverlessex
# app and org for use with dashboard.serverless.com
app: server-app
org: dheerajkumar

# You can pin your service to only deploy with a specific Serverless version
# Check out our docs for more details
# frameworkVersion: "=X.X.X"
provider:
  name: aws
  runtime: nodejs10.x
# you can also these properties 
#  memorySize:512
#  timeout:10
#  versionfunctions:false
#  tracing:true

functions:
  hello:
    handler: handler.hello

handler: property points file and module containing the code you want to run in your function.
During creating a lambda function it will be a common need that we have to maintain folder structure so we have to provide path of lambda function inside our serverless file.
This property is declared inside functions like
permissionsEvery AWS lambda function needs permission to interact with other AWS infrastructure resources within your account.

These roles are set via an AWS IAMRole.

We can set permission policy statements within this role via the property.

provider.iamRoleStatements property.

Environmental Variables: We can add an environment variable configuration to a specific function in serverless.yml by adding an environment object in the function configuration like 


functions:
  hello:

    handler: handler.hello
#    Define function environment variables here
#    environment:
#      variable2: value2

Note: Using an environment variable in a function applies changes to that particular function. But, if we want to apply changes for all functions in our project then we have to need to declare environment variable in provider.


provider:
  name: aws
  runtime: nodejs10.x

# you can also these properties 
#  memorySize:512
#  timeout:10
#  versionfunctions:false
#  tracing:true

# you can define service wide environment variables here
#  environment:
#    variable1: value1

If an environment variable with the same key is defined in the provider level as well as function level then function level key will overwrite the provider level.

Dplyr grammar of Data Manipulation in R

dplyr package is used for Data Manipulation in R.

So it is the reason that’s why dplyr is called grammar of Data Manipulation.

With the help of dplyr package, we can be able to manipulate data and extract useful information easily and quickly.

Installing and loading dplyr package in R

Installing dplyr


/**
  * install dplyr package
*/

install.package("dplyr")

loading dplyr


/**
  * load dplyr package
*/

library(dplyr)

dplyr package contains 5 verbs for Data Manipulation. That we will discuss in this post.

dplyr 5 verbs for Data Manipulation

Dplyr Function Description
Select () Returns subset of the Columns.
Filter() Returns subset of Rows.
Arrange() Reorder rows according to single or multiple variables.
Mutate() Used for adding a new column from the existing column.
Summarize() Reduce each group to a single row by calculate aggregate measure.

For Exploring our knowledge in dplyr we have need a dataset.

So for that purpose, I am loading a variable.

For reading a CSV file we are using read.csv function.

Syntax :


/**
  * load dplyr package
*/


read.csv("file location")

Example:


/**
  * load dplyr package
*/

load_csv_data <- read.csv("/home/dheeraj/Downloads/brazilian-ecommerce/order_items_dataset.csv") ///

print(load_csv_data)

OutPut:

read csv file
Although read.csv() always return data.frame.

We can be able to store read.csv() return inside a variable as in previous example we are storing in load_csv_data. So if we are accessing variable it means we are accessing that data.

Now we are performing some operation with dplyr Package.
For that purpose, we taking all functions of dplyr package and performing some operations.

But Before using dplyr 5 verbs. We should observe our data on which we are going to implement dplyr verbs.
And dplyr package contains a separate function glimpse() for that purpose.


glimpse(): returns Observation of Data frame.
Syntax :


/**
  * load dplyr package
*/

glimpse(data_frame)

Example:


/**
  * load dplyr package
*/

glimpse(load_csv_data)

OutPut:
glimpse
So glimpse() function provides details about our dataframe.
Now we understood that our data frame contains 112,650 rows and 7 columns as shown below.


Observations: 112,650
Variables: 7
$ order_id            
$ order_item_id       
$ product_id          
$ seller_id          
$ shipping_limit_date 
$ price               
$ freight_value

Selecting Column using Select

Select returns subset of columns.
In other words, we can also say that remove columns from the dataset.
Syntax :


/**
  * select syntax
*/

Select(df, column1,column2)
Where df: data frame 
      Column1: name of column1
      Column2: name of column2

Example:

We have already loaded our data inside our load_csv_data variable. So Now perform these following actions

  • Extract order_id,product_id,price from load_csv_data.
  • Extract order_id,order_item_id, product_id,seller_id,shipping_limit_date,price from load_csv_data.
  1. Extract order_id,product_id,price from load_csv_data.


/**
  * select example for extracting columns 
*/

select_Columns <- select(load_csv_data,order_id,product_id,price)

print(select_Columns)

OutPut:

2. Extract order_id,order_item_id, product_id,seller_id,shipping_limit_date,price from load_csv_data.


/**
  * select example for extracting columns 
*/

select_Columns <- select(load_csv_data,order_id,order_item_id, product_id,seller_id,shipping_limit_date,price)

print(select_Columns)

OutPut:

If we have to access columns in a sequence i.e no column should be removed from the sequence.

As in the previous example, we want to access from order_id to price and these columns are in sequence and no column is missing inside sequence.

In this case, we can access our columns like 


/**
  * syntax for select verb in dplyr 
*/


select(data_frame,column1:column(N-i))

So we can also perform our previous operation in this way.


/**
  * select example for extracting columns 
*/


select_Columns <- select(load_csv_data,order_id:price)

print(select_Columns)

OutPut:

Select rows using filter

glimpse() is used for filtering rows on basis of condition.
Syntax:


/**
  * filter syntax
*/

filter(data_frame,condition1 ... condition(N-i))

Example:

Filter row on basis of single condition

Extract row from load_csv_data data frame of which order_id is 5.


/**
  * filter example
*/


selected_rows <- filter(load_csv_data,order_id==5)

print(selected_rows)

OutPut:

Filter row on the basis of multiple conditions.

Extract rows from load_csv_data from which order_item_id=1 and shipping_limit_date= 2017-11-27 19:09:02


/**
  * filter example
*/
 

selected_rows_multiple_conditions <- filter(load_csv_data,order_item_id==1,shipping_limit_date==	 '2017-11-27 19:09:02')

print(selected_rows_multiple_conditions)

OutPut:

Import CSV file in MySQL database using SQL


During Data Analysis it is a common situation during which we have to import CSV files into MYSQL database.

In this post, we will discuss the same scenario and a simple way for importing CSV files using SQL.

Before importing a CSV file we need to create a table that will contain all columns of CSV file.

Suppose I have CSV file order_items_dataset.csv and we want to import this CSV file in  MYSQL Database.

import csv file


Then before importing CSV file, we have to create a table in MYSQL Database.

So, At first, we are creating a table

Create a table in MYSQL Database


/**
  * create order_items_datasets table for importing csv file
*/

CREATE TABLE order_items_datasets (
order_id int PRIMARY KEY,
order_item_id int,
product_id varchar (200),
seller_id varchar(200),
shipping_limit_date DATETIME,
price float,
freight_value float
)

Now our table has been created successfully.

Now we need to import CSV file in order_items_datasets table.

For that, we have to follow these few steps.

STEP 1:   Load Data

For that purpose, we will LOAD DATA Statement.

LOAD DATA Statement: reads a row from a text file into a table with a very high speed.  


# comment line

LOAD DATA

Step 2: Include CSV file

For including CSV file from which we have to import Data we used INFILE command with LOAD DATA  Statement.

INFILE: allow us to read CSV data from a text file.

NOTE: LOAD DATA INFILE statement allows us to read CSV data from a text file and import that into a database table with very fast speed.  

So for Including a file, we will write 


# comment line

LOAD DATA INFILE "/home/dheeraj/Downloads/brazilian-ecommerce/order_items_dataset.csv"  -- file location

Step 4: Import Data to table

For importing data inside the table we will add INTO then after table name with LOAD DATA statement. 

As shown below for importing data into my new table order_items_datasets that we have created previously.


# import data inside table


LOAD DATA INFILE "/home/dheeraj/Downloads/brazilian-ecommerce/order_items_dataset.csv" -- file location
INTO TABLE order_items_datasets -- table name 

Step4: Extract values from CSV file 

CSV file contains comma-separated values. So we need to separate these values on the basis of rows and columns.

For this, we will add these few lines


# comment line

FIELDS TERMINATED BY ',' 
ENCLOSED BY '"'
LINES TERMINATED BY '\n'

Step5: Ignore header of CSV file

During importing CSV file we need to ignore the header. For this, we will add this line.


# ignore header 

IGNORE 1 ROWS;

After following these steps we can be able to import CSV files in MYSQL database.

Complete Query:


/**
Create table
*/

CREATE TABLE order_items_datasets (
order_id int PRIMARY KEY,
order_item_id int,
product_id varchar (200),
seller_id varchar(200),
shipping_limit_date DATETIME,
price float,
freight_value float
)

--  load data 
LOAD DATA

-- include file

LOAD DATA INFILE "/home/dheeraj/Downloads/brazilian-ecommerce/order_items_dataset.csv"  -- file location

-- import data inside table

LOAD DATA INFILE "/home/dheeraj/Downloads/brazilian-ecommerce/order_items_dataset.csv" -- file location
INTO TABLE order_items_datasets -- table name 

-- extract data

FIELDS TERMINATED BY ',' 
ENCLOSED BY '"'
LINES TERMINATED BY '\n'

-- ignore header

IGNORE 1 ROWS;

Basic Of SQL for Data Analysis

Introduction to SQL :

SQL stands for Structural Query Language. 

According to the survey of StackOverflow SQL always remains in the top 5 programming language in the world.

It means you are learning one of the most popular language in the world.

Operation in SQL :

Create Operation :

Create Operation is most basic operation in SQL. 

Create operation is used for multiple purposes like creating a table, creating schema, etc.

For performing a Create Operation, we use Create Command with some keyword as

CREATE SCHEMA :

CREATE SCHEMA command is used for creating schema in SQL

Syntax:


/**
CREATE SCHEMA 
*/

CREATE SCHEMA shema_name;

Example: 


/**
CREATE SCHEMA 
*/

CREATE SCHEMA e_commerce_db;

CREATE TABLE :

Used for Creating table
Syntax :


/**
CREATE SCHEMA 
*/

CREATE TABLE table_name (column_name1 data type  key order_detailsconstraints,column_name1 data type  key constraints … column_namen data type  key constraints)

Example:


/**
CREATE TABLE 
*/
Create table professionals_records(
id int primary key not null AUTO_INCREMENT,
name varchar (100),
mobile varchar(10),
email varchar(200),
city varchar(100),
occupation varchar(200),
designation varchar(100),
salary float
)

CREATE VIEW :

After creating table SELECT command is used for view data inside table (latter discussed about SELECT command). But in the case of SQL, we don’t show the same data for all users. So, in that case, we have to CREATE VIEW.

Syntax :


/**
CREATE SCHEMA 
*/

CREATE VIEW AS view_name( Query for view) 

Note: We will explain the Example of View latter in the same post.

shown below in the table

Create Operation Summary

Create command with keyword Description Syntax Example
CREATE SCHEMA For creating Schema in Database CREATE SCHEMA schema_name CREATE SCHEMA e_commerce_db
CREATE TABLE For creating table in Database CREATE TABLE table_name(column_name data type key constraints , …) CREATE TABLE order_details(id int primary key, name varchar(25) )
CREATE VIEW Used for Creating a view in Database CREATE VIEW AS view_name (query for creating a view) CREATE VIEW AS view_name(SELECT name FROM order_details)

order_details

Insert Operation

For Inserting rows inside a table we use insert command.
There are two different ways for Inserting rows inside the table :

  1. order_detailsInserting a single row inside a table
  2. Inserting multiple rows inside a table

Inserting a single row inside a table :

Syntax:


# comment line

INSERT INTO TABLE table_name(column1,column2,column3 ... , columnN) VALUES(value1,value2,value3 ..., valueN)

Example:

order_details

# Insert Single line


INSERT INTO professionals_records (id,name,mobile,email,city,occupation,designation,salary) 
values (1,'Nitin verma','7739042930','nverma@gmail.com','Jaipur','Engineer','Manager',100000)

Inserting multiple rows inside a table :

Syntax:

order_details

# comment line

INSERT INTO TABLE table_name(column1,column2,column3 ... , columnN) 
VALUES(value1,value2,value3 ..., valueN),
(value1,value2,value3 ..., valueN),
(value1,value2,value3 ..., valueN)
 .
 .
 . 
(value1,value2,value3 ..., valueN)

Example


# Insert Multiple lines


INSERT INTO professionals_records (id,name,mobile,email,city,occupation,designation,salary) 
values 
(1,'Nitin Verma,'7739042930','nverma@gmail.com','Jaipur','Engineer','Manager',100000),
(2,'Mukesh Sharma','9939042932','msharma@gmail.com','Jaipur','Engineer','Software Developer',50000),
(3,'Nimesh Mehra','8965721230','rmehra@gmail.com','Jaipur','Engineer','Software Developer',60000)order_details

SELECT Operation:

SELECT Statement return result set of records from one or more tables.
Syntax:


# comment line

SELECT * FROM table_name 

Note : * denotes all column

Example:


# Select query
SELECT * FROM professionals_records 

we can also specify specific columns also for extracting a particular column.
Syntax:


# comment line

SELECT column1, column2 ... columnN FROM table_name

Example:


# Select query

SELECT name,mobile,email,city,occupation FROM professionals_records; 

WHERE clause :

It is the most important keyword for SELECT Operation.
It is basically used for filtering data from SQL tables.
Syntax:


# comment line

SELECT * FROM table_name WHERE 

Example :


# comment line

SELECT * FROM professionals_records WHERE id=3;

Note: WHERE clause is not only used SELECT statement but also it is also used with UPDATE, DELETE statement.

LIMIT keyword

It is used for limiting how many number of rows that we want to extract.

Syntax :


# comment line

LIMIT number_of_rows;

Example:


order_details
# comment line

SELECT * FROM professionals_records LIMIT 2;

In the above example it will extract only 2 rows from professionals_records table.

Aggregate Function :

Aggregate function basically used for apply a calculation on a column.
It is also used for filtering some value on the basis of some calculations.

Types of Aggregate Function

  • AVG
  • SUM
  • COUNT
  • MIN
  • MAX

Note: AVG, SUM, MIN are applied to numerical values. So before applying these functions on a particular column make sure that the column contains numerical values or not.

Aggregate Function Description Example
AVG() Calculate average of a particular column SELECT avg(salary) FROM professionals_records;
SUM() Calculate sum of selected column SELECT sum(salary) FROM professionals_records;
COUNT() Count number of records (rows) SELECT count (*) FROM professionals_records;order_details
MIN() Return minimum value on applied column SELECT MIN(salary) FROM professionals_records;
MAX() Return maximum value of applied column SELECT MAX(salary) FROM professionals_records;

UPDATE Operation:

Used for updating records inside table.
For changing rows data inside a table we use UPDATE command.order_details
Syntax :


# comment line

UPDATE TABLE table_name set column_name=;

Example :


# comment line


UPDATE TABLE professionals_records SET salary=25000

Just wait from the above query all the values of the salary of all employees will be interchanged with 25000.
And we obviously don’t want to do so.

How do we avoid making such type of mistake?

For avoiding such types of mistakes, we will use WHERE Clause.
Syntax:


# comment line

UPDATE TABLE table_name SET column_name= WHERE ;

Example:


order_details
# comment line


UPDATE TABLE professionals_records SET salary=25000 WHERE id=1

Above query update salary=25000 of which id is 1.

DELETION Operation :

order_detailsDeletion Operation is done for deleting records from Database.
For deleting records from the Database table we use Delete Statement.
Syntax:


# comment line

DELETE TABLE table_name 

Example:

order_details

# comment line

DELETE TABLE professionals_records

It will delete all records from the professionals_records table.
For deleting particular records, we will have to use WHERE clause as shown below.

DELETE Statement with WHERE Clause

order_detailsorder_detailsSyntax :


# comment line

DELETE TABLE table_name WHERE  

Example:


# comment line


DELETE TABLE professionals_records WHERE id=25;

Delete records only for which id is 25.

Tweet on Twitter using Puppeteer

Puppeteer is the most fantastic library developed by Google chrome and it became more popular day by day due to its versatile functionality.

With the help of Puppeteer, anyone automate his browser-specific task. 

Think about if we can be able to do so then how much time we can be able to save and utilize that in doing some more important task.

We are not dealing basic concept of puppeteer here if you want to go through about basic concept of puppeteer then go for  Introduction to Puppeteer from here you will get a basic idea about Puppeteer.

In the feature, we will be also discussing some new concept about some other concept of Puppeteer.

if you have no experience in software development then in that case also Puppeteer is not rocket science. It has been developed with the basic concept of javascript.

After learning Javascript you can be able to build your own application with Puppeteer and can be able to make your time-consuming task very easy with the help of it.

But In this post, we will discuss something more. In this post, we will build a script for posting a tweeter handler account using puppeteer without any user interaction.

We are creating this post just to show how puppeteer can be able to automate your daily activity with some work.

Now we came to the point and build our script. For implementing this script from our own way we have to consider these few points that we should have.

  1. Node.js should be installed on our system
  2. We should have a twitter account.
  3. Nothing more

Then now it’s time to write script 

Step 1: Create a folder 

Just create a folder of developing your script. Just like I have created 
create twitter App
Step2: Execute npm init command


# Execute npm init 

npm init 

Step3: Install puppeteer using this command


# install puppeteer

npm install puppeteer --save

Step4: Create tweetTeeter.js file inside your folder

Step5: Create these separate function for your entire process like


# comment line
handleBrowser() : for opening and closing the browser.
loginTweeter(): for open twitter page and log in to twitter.
tweetTweeter(): for tweet on twitter.
tweetTwitterWithPuppeteer() : for calling all functions.

Now we have already completed the previous 4 steps now it’s time for implementing 5 steps
handleBrowser()
Note: Before running this code make sure that you have import puppeteer package inside your code.


# require puppeteer
const puppeteer=require("puppeteer");

Now go for handleBrowser() function


# comment line

async function handleBrowser() {

 /**
     * Open Browser 
     */

   
    browser = await puppeteer.launch({
        headless: false,
    })
    //open new page
    page = await browser.newPage();
    //set screen 
    await page.setViewport({ width: 1280, height: 800 })

}

After that, your browser will be opened.
browser open

loginTwitter() : handle login activity.
for implement loginTwitter() function add these few lines of code.


async function loginTweeter() {
    try {
        /** Define twitter fields */
        let twitterAccount = {
            userField: "input[name='session[username_or_email]']",
            passField: "input[name='session[password]']",
            loginSubmit: ".EdgeButton"
        };
        await page.goto('https://twitter.com');

        await page.waitFor(5000);
          /** Enter twitter id */
        await page.waitForSelector(twitterAccount.userField);
        await page.click(twitterAccount.userField);
        await page.keyboard.type('krdheeraj51');
          /** Enter twiiter password */
        await page.waitForSelector(twitterAccount.passField);
        await page.click(twitterAccount.passField);
        await page.keyboard.type('enter twitter password');
          /** Click Button  */
        await page.waitFor(2000);
        await page.waitForSelector(twitterAccount.loginSubmit);
        await page.click(twitterAccount.loginSubmit);
        await page.waitFor(3000);
    } catch (err) {
        console.log(err);
        return err;

    }
}

loginTwitter() : function at first open the login page then after entering your username and password.

And then after click on submit button and you will redirect to twitter home page.

t

tweetTwitter() : function that writes tweet and post from your twitter account and for this purpose write these few lines of code.


async function tweetTweeter() {
    try {
        await page.goto('https://twitter.com/home');
 
        /** 
         * tweet on twitter
         */

        await page.waitForSelector('.DraftEditor-editorContainer');
        await page.click('.DraftEditor-editorContainer');
        
        /**
         * write your twitter post
         */
        await page.keyboard.type("krdheeraj51 #krdheeraj #freelearning #100DaysOfCode #puppeteer #googlechrome  I like Puppeteer because it automate browser-specific tasks.");
        await page.waitFor(3000);
 
        /**
         * Click tweet button for submit post
         */

        await page.waitForSelector('#react-root > div > div > div > main > div > div > div > div.css-1dbjc4n.r-14lw9ot.r-1tlfku8.r-1ljd8xs.r-13l2t4g.r-1phboty.r-1jgb5lz.r-11wrixw.r-61z16t.r-1ye8kvj.r-13qz1uu.r-184en5c > div > div.css-1dbjc4n.r-14lw9ot.r-184en5c > div.css-1dbjc4n.r-156q2ks > div:nth-child(1) > div > div > div.css-1dbjc4n.r-1iusvr4.r-16y2uox.r-15d164r.r-5f2r5o.r-1bylmt5.r-13tjlyg.r-7qyjyx.r-1ftll1t > div:nth-child(2) > div > div > div:nth-child(2) > div.css-18t94o4.css-1dbjc4n.r-urgr8i.r-42olwf.r-sdzlij.r-1phboty.r-rs99b7.r-1w2pmg.r-1n0xq6e.r-1vuscfd.r-1dhvaqw.r-1fneopy.r-o7ynqc.r-6416eg.r-lrvibr')[0];
        await page.click('#react-root > div > div > div > main > div > div > div > div.css-1dbjc4n.r-14lw9ot.r-1tlfku8.r-1ljd8xs.r-13l2t4g.r-1phboty.r-1jgb5lz.r-11wrixw.r-61z16t.r-1ye8kvj.r-13qz1uu.r-184en5c > div > div.css-1dbjc4n.r-14lw9ot.r-184en5c > div.css-1dbjc4n.r-156q2ks > div:nth-child(1) > div > div > div.css-1dbjc4n.r-1iusvr4.r-16y2uox.r-15d164r.r-5f2r5o.r-1bylmt5.r-13tjlyg.r-7qyjyx.r-1ftll1t > div:nth-child(2) > div > div > div:nth-child(2) > div.css-18t94o4.css-1dbjc4n.r-urgr8i.r-42olwf.r-sdzlij.r-1phboty.r-rs99b7.r-1w2pmg.r-1n0xq6e.r-1vuscfd.r-1dhvaqw.r-1fneopy.r-o7ynqc.r-6416eg.r-lrvibr')[0];
        await page.waitFor(5000);
        console.log("Tweet has been posted successfully.");
         /**Close browser */
        browser.close();

    } catch (err) {
        console.log(err);

    }
}

After executing this function your tweet added

Then after posted from your Twitter account.

tweet posted
tweetTwitterWithPuppeteer() : These all functions are handled in a single for performing these complete process in a complete chain which contains these few lines of code.


async function tweetTwitterWithPuppeteer() {
    try {
         /** handle browser activity */
        await handleBrowser();
         /** handle login Activity */
        await loginTweeter();
         /** handle tweet activity */
        await tweetTweeter();
    } catch (err) {
        console.log(err);
        return err;
    }
}

Now Your complete script will be look like


/**
 * require puppeteer library
 */
const puppeteer = require("puppeteer");

async function tweetTwitterWithPuppeteer() {
    try {
 
        /** handle browser activity */
        await handleBrowser();
         /** handle login Activity */
        await loginTweeter();
         /** handle tweet activity */
        await tweetTweeter();
    } catch (err) {
        console.log(err);
        return err;
    }
}
 
/**
 * call tweetTwitterWithPuppeteer() i.e is handling whole process
 */ 
tweetTwitterWithPuppeteer();

async function loginTweeter() {
    try {
         /** Define twitter fields */
        let twitterAccount = {
            userField: "input[name='session[username_or_email]']",
            passField: "input[name='session[password]']",
            loginSubmit: ".EdgeButton"
        };
        await page.goto('https://twitter.com');

        await page.waitFor(5000);
         /** Enter twitter id */
        await page.waitForSelector(twitterAccount.userField);
        await page.click(twitterAccount.userField);
        await page.keyboard.type('krdheeraj51');
         /** Enter twiiter password */
        await page.waitForSelector(twitterAccount.passField);
        await page.click(twitterAccount.passField);
        await page.keyboard.type('enter twitter password');
         /** Click Button  */
        await page.waitFor(2000);
        await page.waitForSelector(twitterAccount.loginSubmit);
        await page.click(twitterAccount.loginSubmit);
        await page.waitFor(3000);
    } catch (err) {
        console.log(err);
        return err;

    }
}

async function tweetTweeter() {
    try {
        await page.goto('https://twitter.com/home');
         /** 
         * tweet on twitter
         */
        await page.waitForSelector('.DraftEditor-editorContainer');
        await page.click('.DraftEditor-editorContainer');
         /**
         * write your twitter post
         */
        await page.keyboard.type("krdheeraj51 #krdheeraj #freelearning #100DaysOfCode #puppeteer #googlechrome  I like Puppeteer because it automate browser-specific tasks.");
        await page.waitFor(3000);
         /**
         * Click tweet button for submit post
         */
        await page.waitForSelector('#react-root > div > div > div > main > div > div > div > div.css-1dbjc4n.r-14lw9ot.r-1tlfku8.r-1ljd8xs.r-13l2t4g.r-1phboty.r-1jgb5lz.r-11wrixw.r-61z16t.r-1ye8kvj.r-13qz1uu.r-184en5c > div > div.css-1dbjc4n.r-14lw9ot.r-184en5c > div.css-1dbjc4n.r-156q2ks > div:nth-child(1) > div > div > div.css-1dbjc4n.r-1iusvr4.r-16y2uox.r-15d164r.r-5f2r5o.r-1bylmt5.r-13tjlyg.r-7qyjyx.r-1ftll1t > div:nth-child(2) > div > div > div:nth-child(2) > div.css-18t94o4.css-1dbjc4n.r-urgr8i.r-42olwf.r-sdzlij.r-1phboty.r-rs99b7.r-1w2pmg.r-1n0xq6e.r-1vuscfd.r-1dhvaqw.r-1fneopy.r-o7ynqc.r-6416eg.r-lrvibr')[0];
        await page.click('#react-root > div > div > div > main > div > div > div > div.css-1dbjc4n.r-14lw9ot.r-1tlfku8.r-1ljd8xs.r-13l2t4g.r-1phboty.r-1jgb5lz.r-11wrixw.r-61z16t.r-1ye8kvj.r-13qz1uu.r-184en5c > div > div.css-1dbjc4n.r-14lw9ot.r-184en5c > div.css-1dbjc4n.r-156q2ks > div:nth-child(1) > div > div > div.css-1dbjc4n.r-1iusvr4.r-16y2uox.r-15d164r.r-5f2r5o.r-1bylmt5.r-13tjlyg.r-7qyjyx.r-1ftll1t > div:nth-child(2) > div > div > div:nth-child(2) > div.css-18t94o4.css-1dbjc4n.r-urgr8i.r-42olwf.r-sdzlij.r-1phboty.r-rs99b7.r-1w2pmg.r-1n0xq6e.r-1vuscfd.r-1dhvaqw.r-1fneopy.r-o7ynqc.r-6416eg.r-lrvibr')[0];
        await page.waitFor(5000);
        console.log("Tweet has been posted successfully.");
         /**Close browser */
        browser.close();

    } catch (err) {
        console.log(err);

    }
}
async function handleBrowser() {
     /**
     * Open Browser 
     */
    browser = await puppeteer.launch({
        headless: false,
    })
     //open new page
    page = await browser.newPage();
     //set screen 
    await page.setViewport({ width: 1280, height: 800 })

}

For executing this script use this command


node filename.js 
/**
 * like here file name is tweetTwiteer.js
*/

You can also download a complete project from  Github

download from git

Text Data Mining from Social media

Today Social media is a huge source for data. And in 21 century we know the importance of   Data. 21 is the age of Data in this business starts from data, business grow from data and business also collapse in the absence of Data, even in this age idea come from data.

Some advantages of Social media information

  • Setting goals on the basis of trends
  • Knowing about the market from our actual customers
  • Feedback of our product
  • Generating ideas on the basis of customers

This is the reason which today’s business leaders are more interested in mining  Data in comparison to mining the earth.

Now, people are interested in extracting information form  Data in comparison to extracting minerals from earth.

 Facebook and twitter are giants in the social media industry. Both have a huge amount of live data as well as historical (approx 10 old data). 

So today we will learn some tips for extracting information from facebook and twitter.

At first, we will go for facebook then we will also discuss some tips for extracting information from twitter.

Data Extraction from facebook

Facebook is a huge source of live data as well as historical data (approx 10 years old). facebook data also helps us in making business decisions or understanding market trends.

Rfacebook package is used for extracting information from facebook after accessing facebook API functions using R language.

This package provides a series of  functions that help us (R developers)  to access facebook API and getting these following information

  • Users and posts
  • Get public information
  • Get public page details

And much more information we can be able to collect from facebook.

But before accessing facebook API using Rfacebbok package we need to generate auth token from developer facebook website after which facebook authenticates us for using their API.

So for generating auth token we have to follow these few steps as shown below.

Step 1: Goto this link (After login from your facebook account)  

https://developers.facebook.com/tools/explorer

Step 2: Click on generate token Button and your token will be generated. (as shown below)

Now we came to the state where we can be able to extract information from Facebook using Rfacebook package.

So for that, we have to follow these few steps :

Step 1: Install R package 


# install Rfacebook package
install.package('Rfacebook')

Step 2: Load package


# load package
library('Rfacebook')

Step 3: Set token


# set tokken
token <- 'after genrating token form facebook developer page paste here'

Now we are ready to extract information from Facebook using Rfacebook package