Reactive Programming using shiny

Reactive Programming helps us to build an interactive application using shiny.

In shiny, there are three fundamental components of Reactive Programming :

  1. Reactive source
  2. Reactive endpoint
  3. Reactive conductor

Reactive source

– User input that comes through browser interface typically.
– It can be connected through multiple endpoints.


# load library
library(shiny)
#create ui
ui <- fluidPage(
  textInput('name','Enter your name'),
  
)
# create server
server <- function(input,output,session){
  
}
# Run the app
shinyApp(ui,server)

Reactive endpoint

– Something that appears in the user’s browser window, such as a plot or a table of values.
– In simple words, we can say that output that typically appears in the browser window, such as a plot or a table of values.


#load library
library(shiny)
#create ui
ui <- fluidPage(
  textInput('name','Enter your name'),
  textOutput('greeting')
  
)
#create server
server <- function(input,output,session){
  output$greeting <- renderText({
    paste('Hello ',input$name)
  })
  
}
#Run the app
shinyApp(ui,server)

Reactive conductor

– Reactive component between a source and endpoint typically used to encapsulate slow computations.


# create server
server <- function(input,output,session){
  #plot putout
  output$plot_trendy_names <- ploty::renderPlotly({ babynames %>%
      filter(name == input$name) %>%
      ggplot(val_bnames, aes(x=year, y=n)) +
      geom_col()
  })
  #table output
  output$table_trendy_names <- DT::renderDT({ babynames %>%
      filter(name== input$name)
  })
}

Reactive Expression

– A Reactive expression is an R expression that uses widget input and returns a value.
– The reactive expression will update this value whenever the original widget changes.
– Reactive expressions are lazy and cached.

To create a reactive expression we use reactive function, which takes an R expression surrounded by braces (just like render function).


ui <- fluidPage(
  numericInput('nrows', 'Number of Rows', 10, 5, 30),
  tableOutput('table'), 
  plotOutput('plot')
)
# create server
server <- function(input, output, session){
 #input 1
 
  cars_1 <- reactive({
    print("Computing cars_1 ...")
    head(cars, input$nrows)
  })
#input 2
  cars_2 <- reactive({
    print("Computing cars_2 ...")
    head(cars, input$nrows*2)
  })
 #output plot
 
  output$plot <- renderPlot({
    plot(cars_1())
  })
#output table  
  output$table <- renderTable({
    cars_1()
  })
}
# Run the app
shinyApp(ui = ui, server = server)

Note: A reactive expression can call other reactive expressions.That allows us to modularize computations and ensure that they are NOT executed repeatedly.

You should also visit
Build a Hello world shiny App With R

More about shinny App (Inputs, Outputs, Layouts)

More about shinny App (Inputs, Outputs, Layouts)

In the previous post, we hadĀ Build a Hello world shiny App With R.
In this post, we will cover some points regarding shiny Package. During this journey, we will go through these points :


#Design Layout
#Shiny Inputs
#Shiny Outputs

Design Layout

For designing layout, we use sidebarLayout() function. As we know that all the functions we write inside UI parts. As we know all the functions that we use for designing we write these functions in the UI part.


ui <- fluidPage( sidebarLayout()
)

sidebarLayout()

sidebarLayout() functions contains two different panels.

  • sidebarPanel()
  • mainPanel()

So, Now our code will look like this


#sidebarPanel syntax
ui <- fluidPage(
        sidebarLayout({
             sidebarPanel(),
             mainPanel()
})
)

Some more points about sidebarLayout() function

  • sidebarPanel() : In this panel input is stored.
  • mainPanel() : In this panel outPut is stored.

#load library
library(shiny)
library(ggplot2)

# create a html ui with html function
ui <- fluidPage(
  sidebarLayout(
     sidebarPanel(
       #taking user input
       textInput("name","Enter your Name"style="border: 2px solid;")
     ),
    mainPanel(
      plotOutput('trend')
    )
  )
)
#create a server
server <- function(input, output, session) {
  output$trend <- renderPlot({
    ggplot()
  })
}
#Run App
shinyApp(ui = ui, server = server)

OutPut:

shiny Inputs

shiny provides variety of input elements.

textInput


#load library
library(shiny)
# create a html ui with html function
ui<- fluidPage(
  textInput('name','Enter your name'),
  textOutput('name')
)
#create a server
server <- function(input, output,session){
  output$name <- renderText({
    paste('Hi ', input$name)
  })
}
#Run App
shinyApp(ui,server)

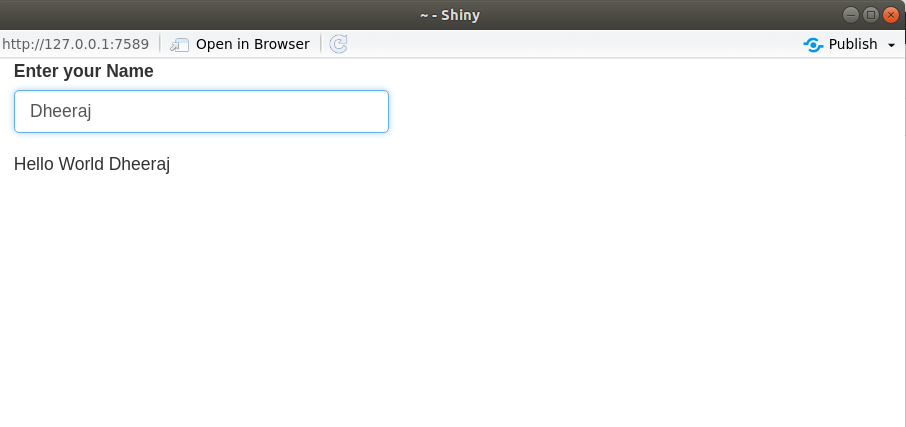
OutPut:

selectInput


#load library
library(shiny)
# create a html ui with html function
ui<- fluidPage(
  selectInput('hobby','Enter your Hobby',
              choices = c("Reading","Playing","Dancing","Swimming")),
  textOutput('result')
),
#create a server
server <- function(input, output,session){
  output$result <- renderText({
    paste('You are found of ', input$hobby)
  })
}
#Run App
shinyApp(ui,server)

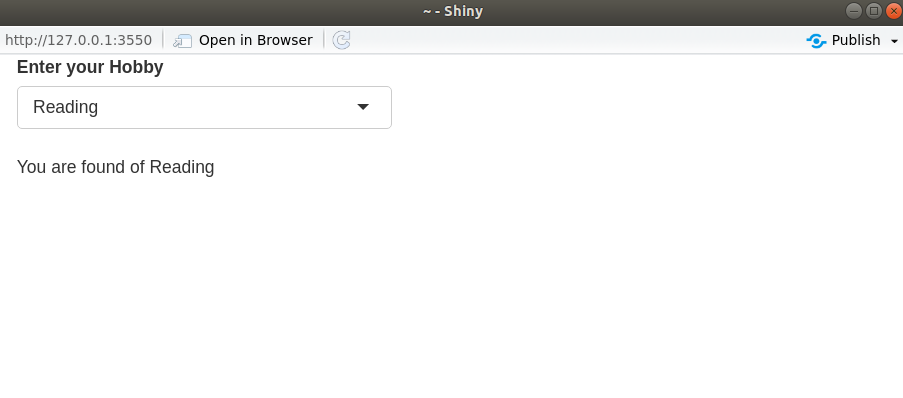
OutPut:

sliderInput


#load library
library(shiny)
# create a html ui with html function
ui <- fluidPage(
  sliderInput('salary','Select your salary',
              value=30000,min=10000,max=500000),
  plotOutput('salaryResult')
)
#create a server
server <- function(input,output,session){
  output$salaryResult <- renderPlot(
       hist(rnorm(input$salary))
  )
}
#Run App
shinyApp(ui, server)

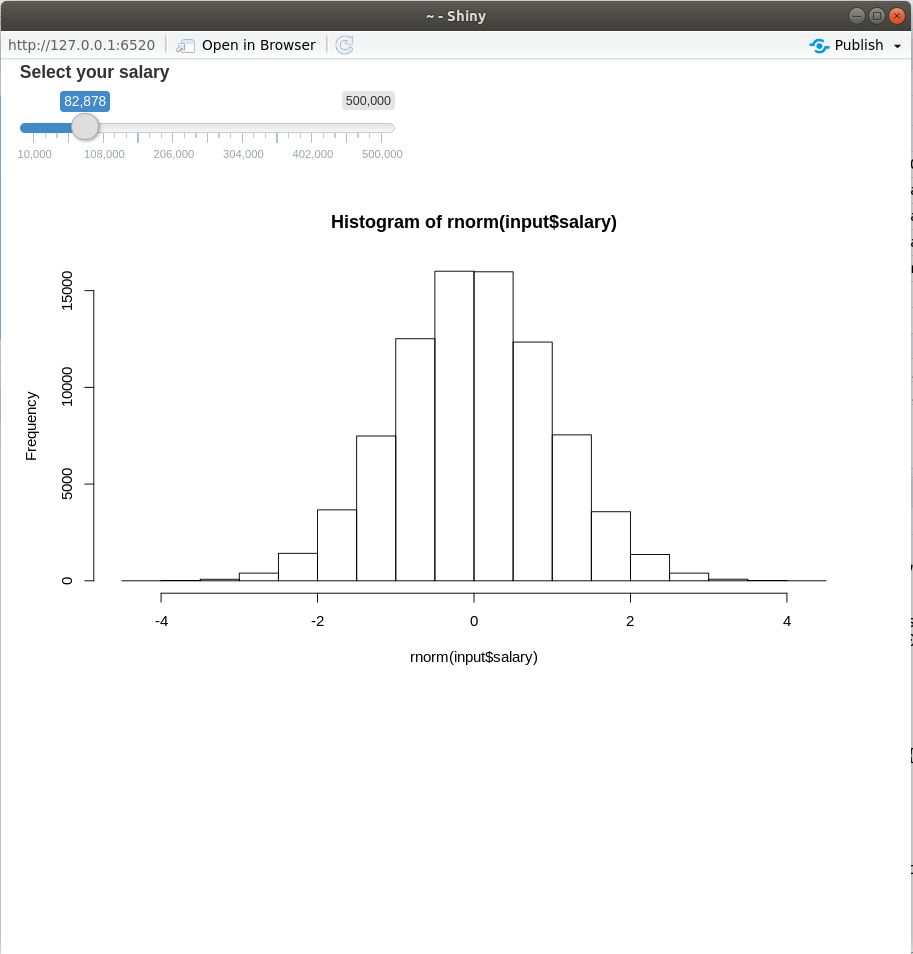
OutPut:

Build a Hello world shiny App With R
Introduction to Shiny

Shiny is R Package that allows you to turn your analysis into an interactive and engagingĀ  Web Application using R.

In this post, we will develop a Hello World shiny application. In an upcoming post, we will explore more about the shiny package and develop more applications.

Now without wasting our time, we move for developing shiny App.

For developing a shiny we have to follow these steps :

  • Install Shiny Package
  • Load Shiny Package
  • Create a HTML UI with HTML function
  • Create a Server
  • Run the app

Install Shiny Package


# install shiny package
install.packages("shiny")

Load Shiny Package


# load shiny package
library(shiny)

Create a HTML UI with HTML function


#Create a HTML UI with HTML function
ui <- fluidPage("Hello World")

Create a Server


#create shiny server
server <- function(input,output,session){
}

Run the app


#Run the app
shinyApp(ui=ui,server=server)

Hence for building Hello World app with shiny we have write following lines of code.


# install shiny package
install.packages("shiny")
# load shiny package
library(shiny)
#Create a HTML UI with HTML function
ui <- fluidPage("Hello World")
#create shiny server
server <- function(input,output,session){
}
#Run the app
shinyApp(ui=ui,server=server)

OutPut

Now we are modifying our script and make it a little bit dynamic.
For that, we will add an input textbox When you insert your name inside the textbox. Suppose I have inserted my name inside textbox then it will contact with Hello World and complete text will be Hello World Dheeraj.

So, Now the question rises how to add an input text field for entering your name then for that purpose Shiny has defined some functions.


#taking user input
ui <- fluidPage(textInput("name","Enter your Name"),
                textOutput("q"))

Then after we will concate this input name with Hello World text as shown below.


load library
library(shiny)

# create a html ui with html function
#taking user input
ui <- fluidPage(textInput("name","Enter your Name"),
                textOutput("q"))
#create a server
server <- function(input,output,session){
  output$q <- renderText({
    paste("Hello World ",input$name)
  })
}
#Run an PP
shinyApp(ui, server)

OutPut